Process Item
A Process Item (also referred to as a Document) is the core working unit within a Process Flow or a Board in NileDesk.
For example, if a template is created for Support Requests, users can add multiple requests based on that template. The template defines the structure, behavior, and flow of each request, while the individual requests created by users are called Items or Documents.
Similarly, in a sales pipeline board, each deal created by different sales representatives becomes a separate Board Item. These items may also be referred to as Deals or Documents, depending on the context.
Create a New Item:
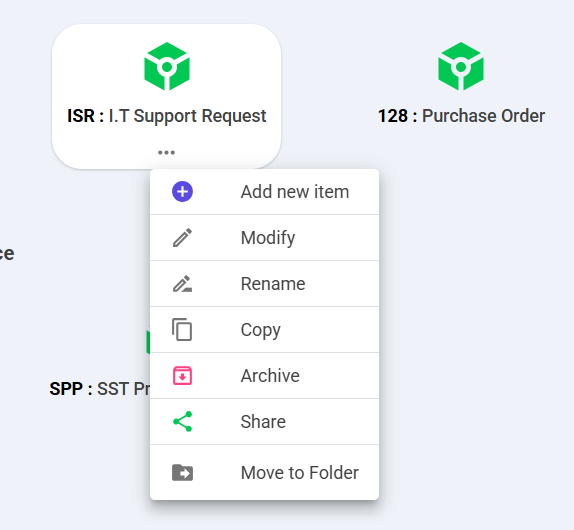
- Navigate to the Home screen.
- Find the desired Process Flow or Board.
- Click the three-dot ... menu on its card.
- Select Add Item to open a new blank form.
You can also create a new item directly from within a process workspace by clicking the Add Item button in the top-right corner.
Every new item starts in the status Draft, meaning it has been created but not yet submitted into the workflow. Once submitted, the item follows the rules and routing defined in the process or board template.
Note: If you don’t see the Add Item option, it means your account does not have permission to create items for that process.
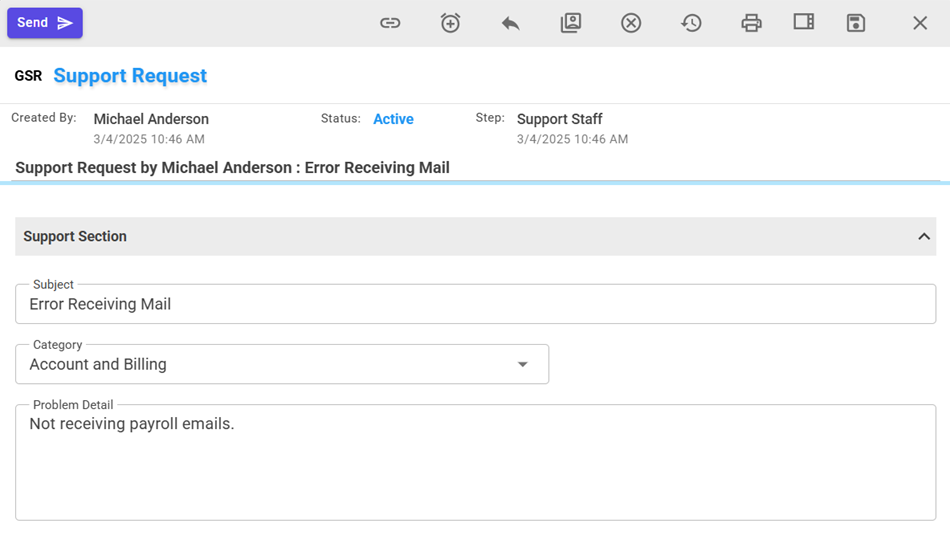
For a new item the form layout you see depends on how the template’s Start Step is configured. Fill in the required fields according to your business needs and then click Send to move the document forward. The item will automatically transition to the next step or assigned users as defined in the process design.
Note: In Boards, when you submit a draft item, a dropdown appears showing all the available columns where the item can be placed. Selecting a column transitions the item directly to that stage, applying any automations defined for that column.
Form Table Sections
Some forms include table sections to handle repeating data, such as line items in an invoice or an order. By default, tables are empty. To add a row, click the + icon at the top of the table. Each new row behaves like a grid—similar to Excel—where you can type directly into cells depending on the field type. You can keep pressing + to add as many rows as needed.
Form Toolbar Options
The toolbar at the top of the form provides actions you can perform on the current item. Available options vary depending on:
- The current step in the process
- Your role and access level
For example, a draft may only show Send, while an in-progress approval might display Approve or Reject.
- Send: Completes your work on the item and routes it to the next step.
- Approve / Reject: (Approval steps only) Replaces the Send button with clear decision options.
- Copy URL: Copies a direct link to the item for sharing.
- Return: Sends the item back to a previous step. A dialog shows all eligible steps to return to.
- Edit Assignment: Adjust user assignments for the current item by adding/removing people or transferring ownership.
- Cancel:(For Process Flow only) Cancels the process flow for this item.
- Data Change History: Shows a field-level history of edits made by different users.
- Print: Prints the form in its current layout. If PDF templates are configured, you can generate a formatted PDF version.
- Sidebar: Opens a side panel with extra actions:
- Post comments in a chat-like thread, including tagging teammates.
- Set an overdue date for the document.
- View the timeline of executed steps with user actions and timestamps.
- Set Reminder: Schedule reminders (e.g., 30 minutes, 1 day, or a custom date/time). Notifications appear in the mobile or PWA app.
- Save: Saves form data without submitting. Data is auto-saved when you press Send.
- Delete Draft: Deletes the item while still in draft mode. This option disappears once the item is active.
Completion
Once the process is complete, the item becomes read-only. You can review it anytime in My Docs or Activities. All fields, history, and workflow actions remain visible for auditing or reference in its Timeline.