How to Upload Data
You can upload bulk records into a Dataset, Data Forms and Form Tables by importing a CSV or Excel file. This allows you to bring in large amounts of data quickly, with options to either append to existing records or replace them entirely.
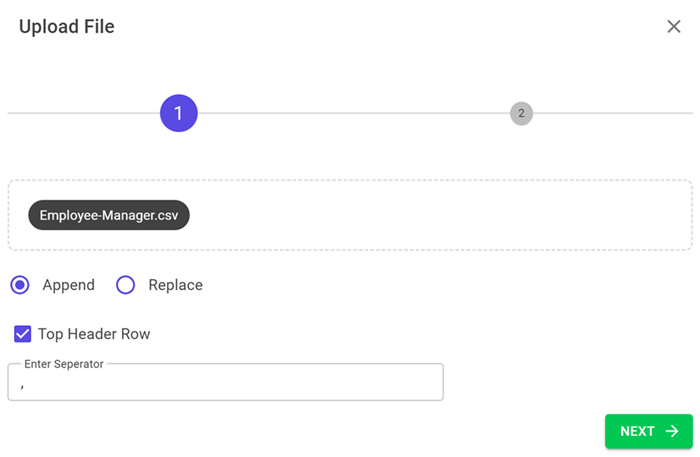
Step 1: Upload File
- Upload or drag-and-drop a CSV or Excel file into the uploader.
-
Choose the import mode:
Append → Adds the new rows from your file to the existing dataset.
Replace → Removes all current dataset records and replaces them with the ones in your file. - If your file has a header row (column names in the first row), select Yes for Top Row Header. Otherwise, select No.
- For CSV files, select the correct separator (e.g.,
,or;) to match your file format.
Step 2: Mapping
After clicking Next, the system previews the first 5 rows of your file (header row will not be uploaded). Map each file column to a dataset field:
- To skip a column, leave its mapping blank.
- Key Field is mandatory and can only be selected once.
- Only mapped fields will be uploaded.
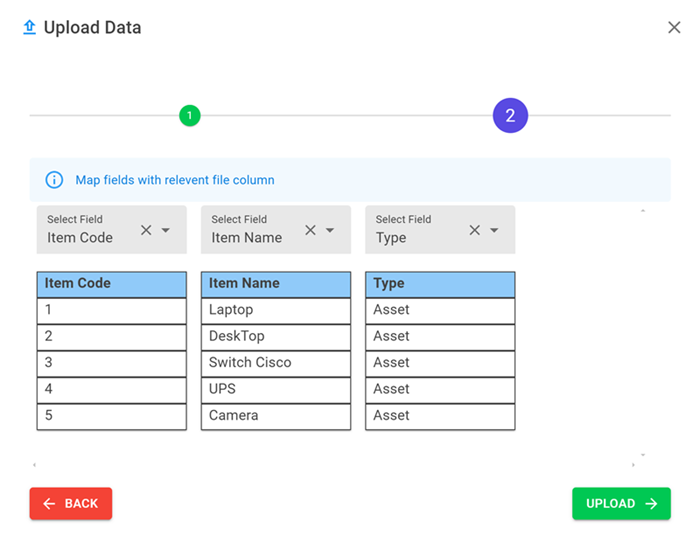
After confirming mappings, click Upload. Data import will begin. If there are datatype mismatches (e.g., a text value in a number field), errors will be shown. A summary will display the number of records successfully uploaded and any errors encountered.
File Requirements
- File format: CSV or Excel only.
- Pictures and attachments cannot be uploaded via import.
- Checkbox values must be
true/false. - Numbers must be valid integers or decimals.
- Date values must be in
dateordatetimeformat. - For Datasnap, Datalink, Userlink → provide their keys; links/snaps will be auto-created.
- For Multiselect → separate multiple keys with
;.