Approval Step
Here, a specific person checks the details and decides if they agree (approve) or disagree (reject). It's a way to get a clear decision in your workflow.
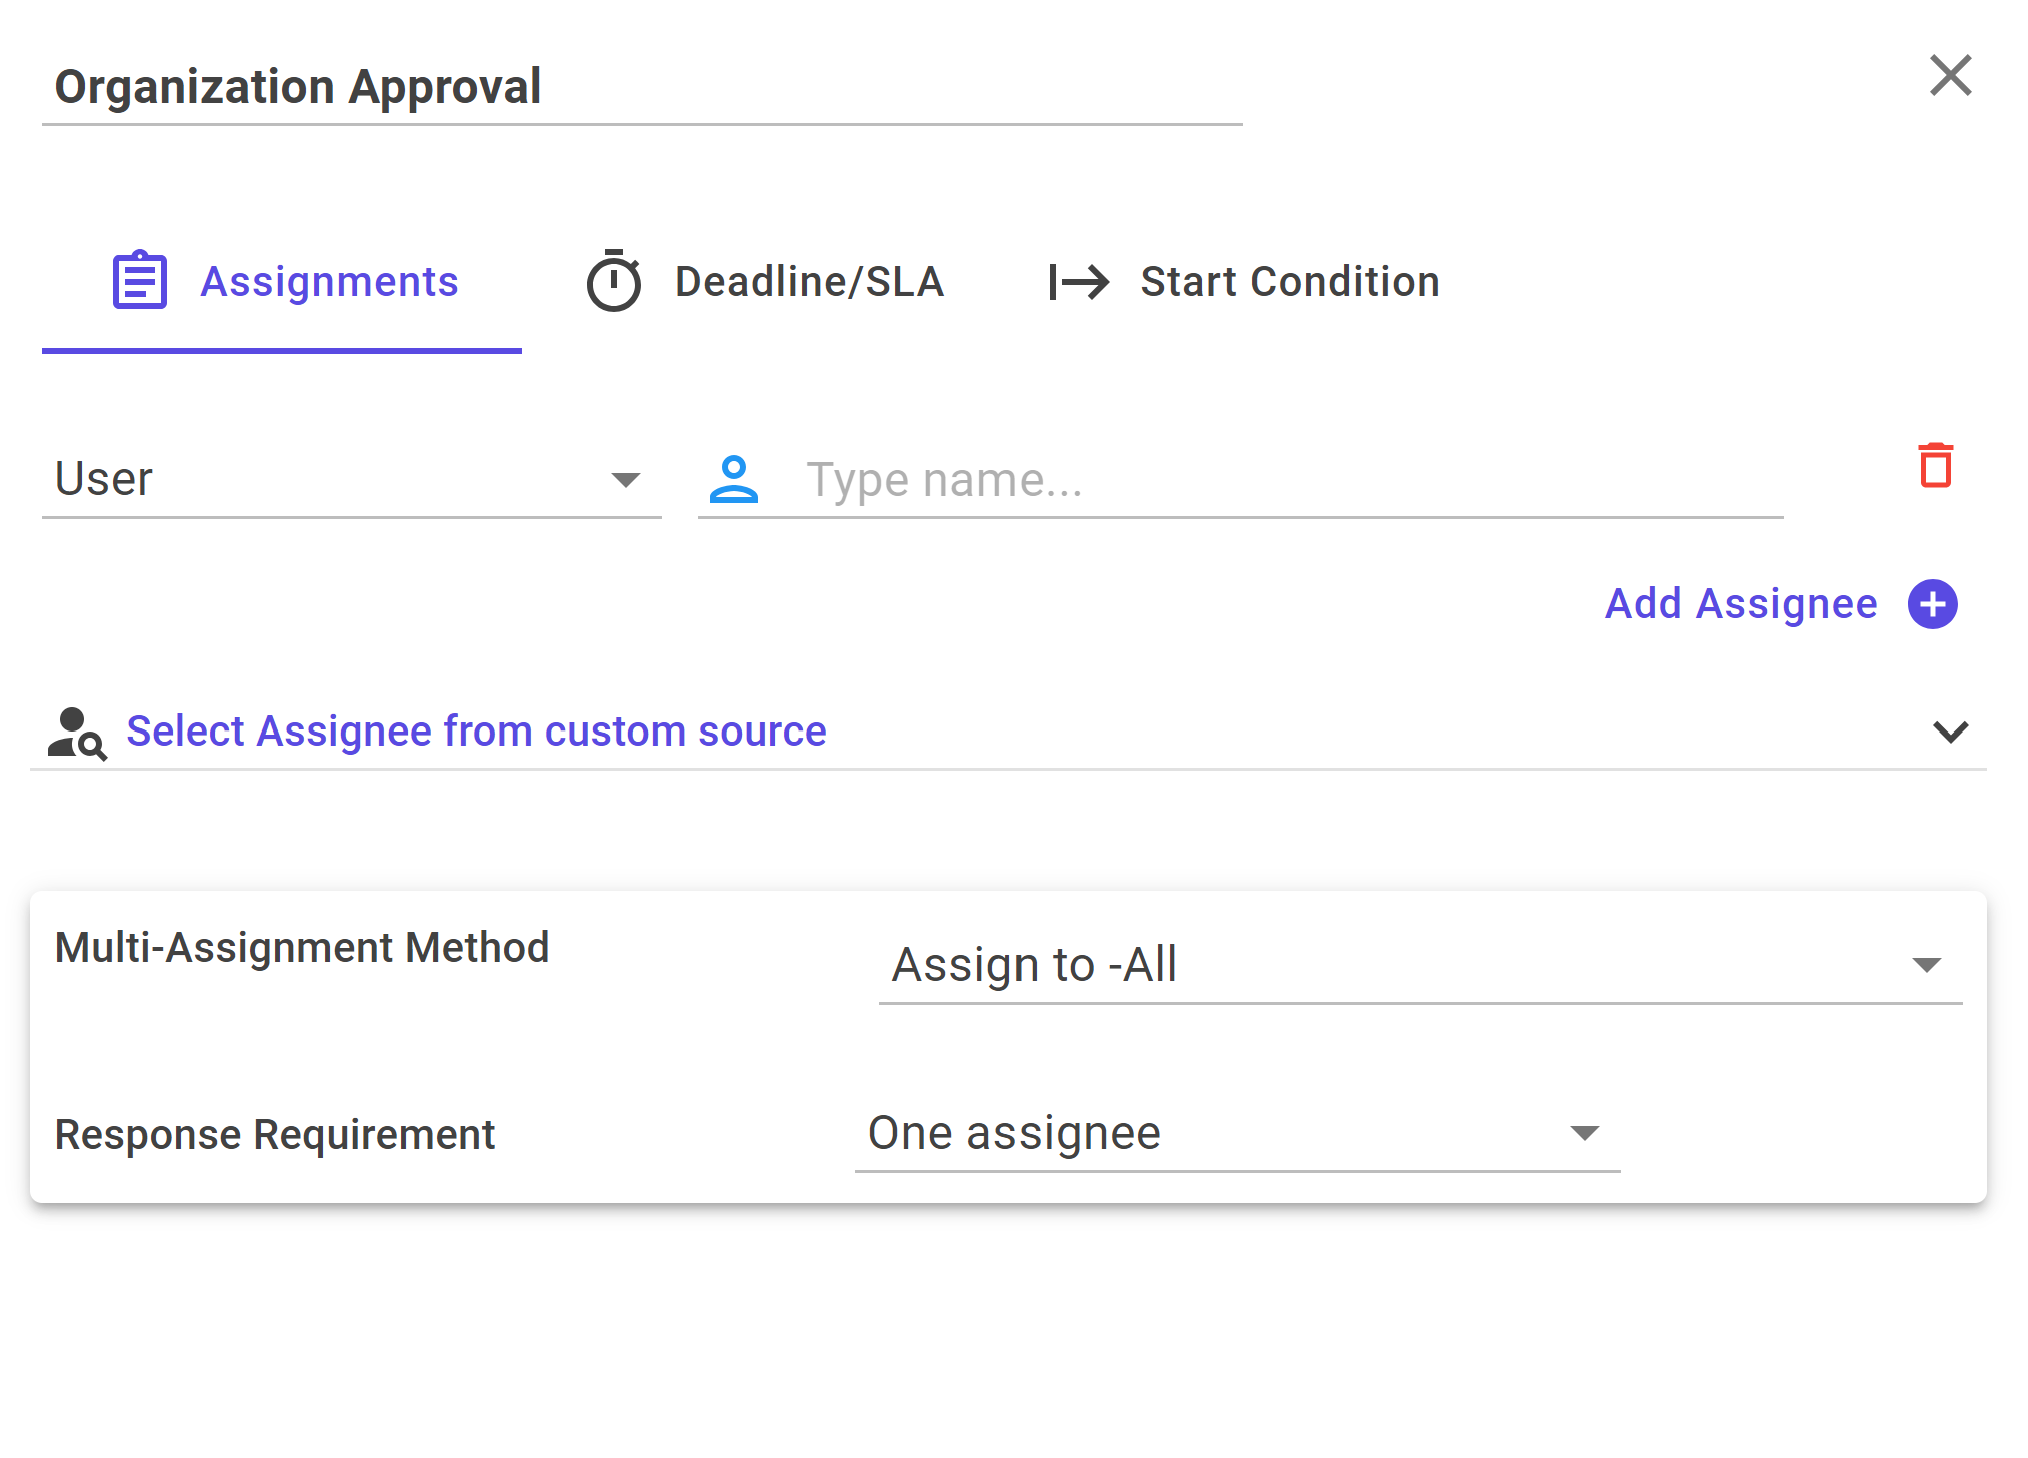
In approval step editor, the Input Field allows you to assign a name to your step. Providing a meaningful name is important for clarity and organization, enabling you to easily recognize and understand the purpose of each step within your workflow.
Assignment
This section provides information about the assignment in your project.
Assignment Options
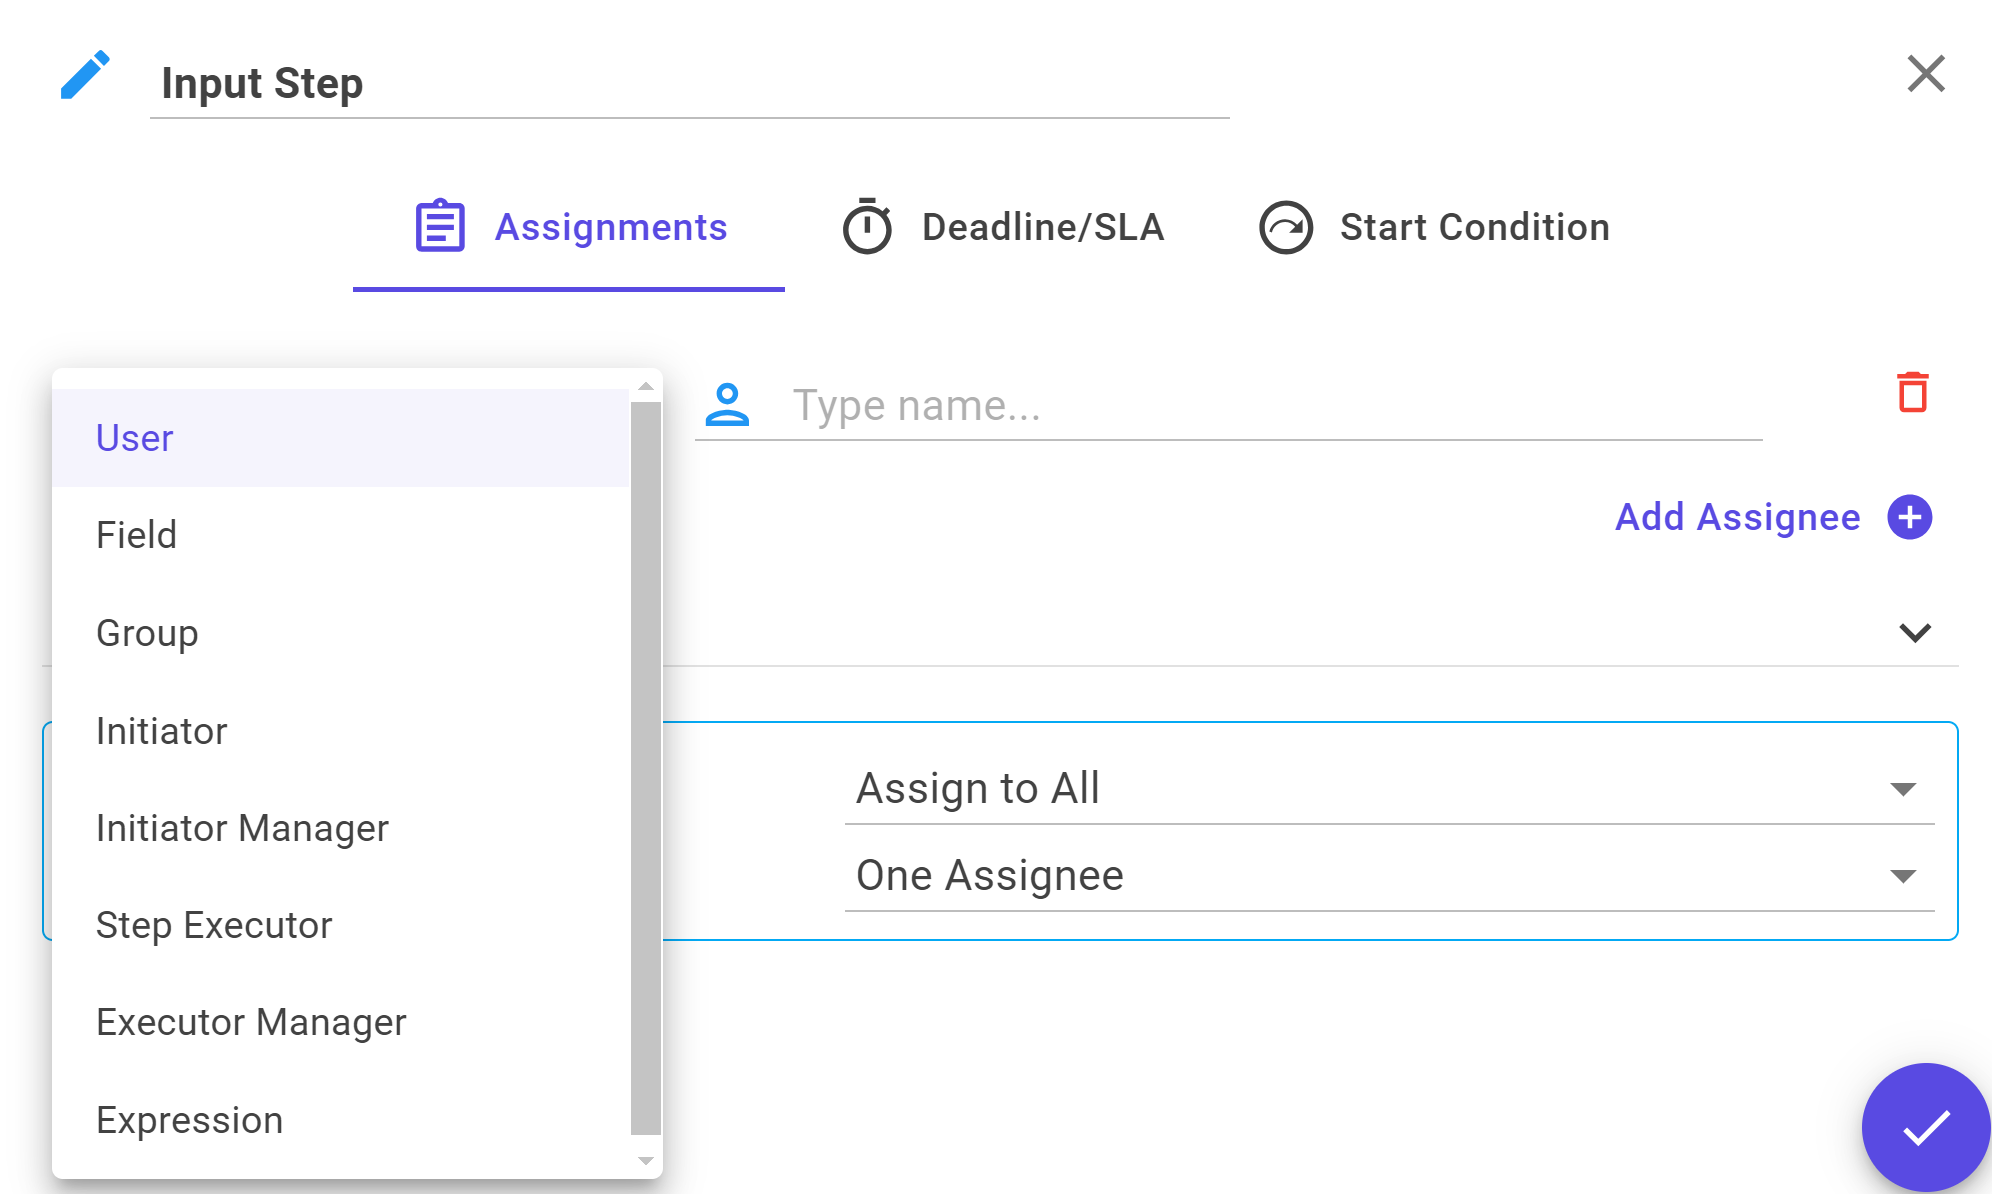
The assignment process begins with a dropdown menu offering various options for document assignment. The options include:
- User: Choose this option to assign the document directly to a specific user. After selecting this option, a text field labeled "Type Name" will appear. Enter the username of the user to whom the document will be assigned.
- Field: If you select this option, an additional field labeled User Field will be displayed. Choose the user field from the form fields to whom the document will be assigned.
- Group: Use the "Select Group" dropdown to choose the group to which the document will be assigned.
- Inititiator: Assign Document automatically to the user who create this document.
- Inititiator Manager: Assign Document automatically to the manager of user who create this document.
- Step Executor: Once you've chosen the step, the document will be assigned to the executor of that step.
- Executor Manager: Once you've chosen the step, the document will be assigned to the manager of the executor of that step.
- Expression: if you want to define a custom expression for getting user and assigned to that user.
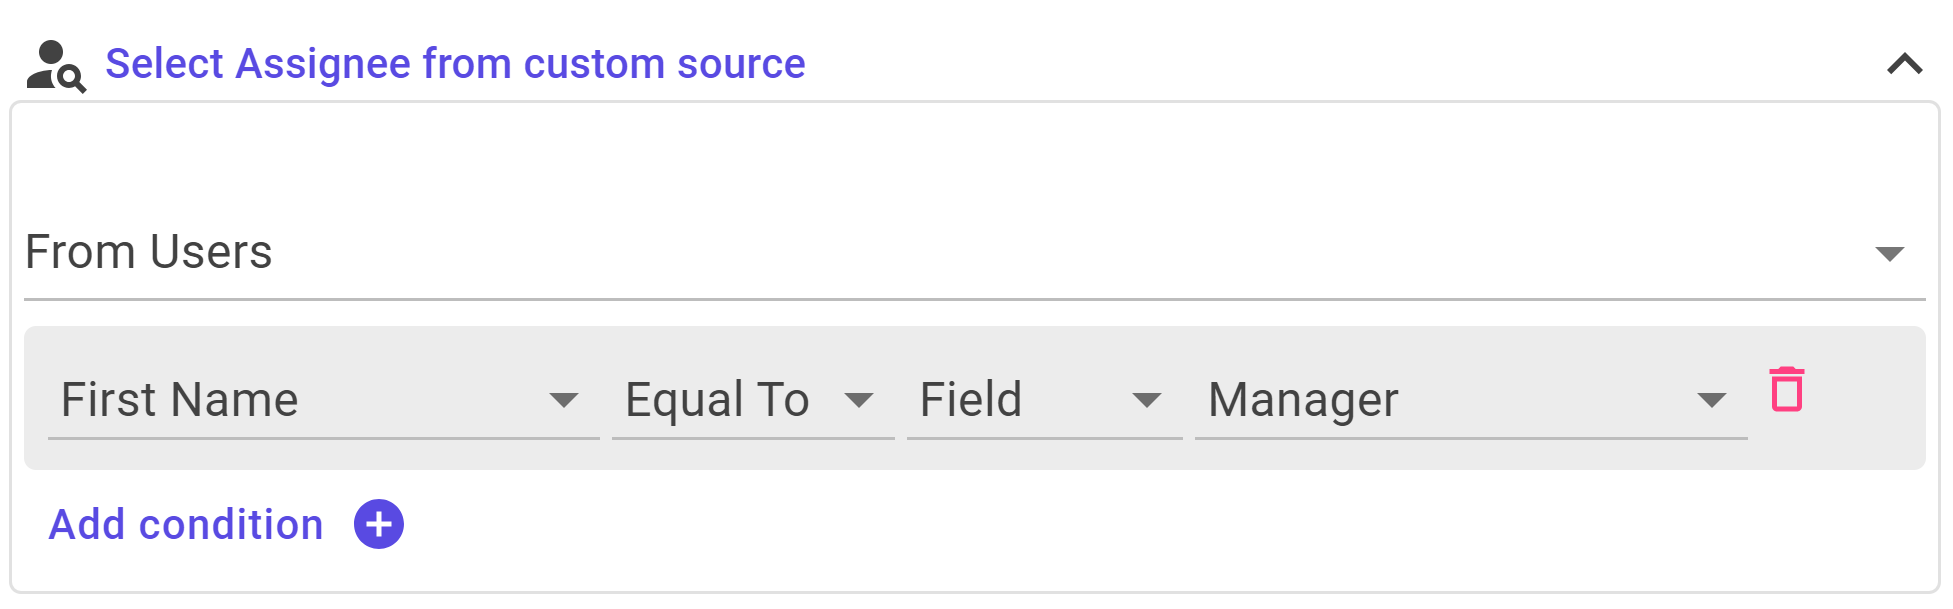
If you need to select assignees from a custom source, you can do so by opening the Select Assignees from custom source panel. This feature supports two sources: Users and Datasets.
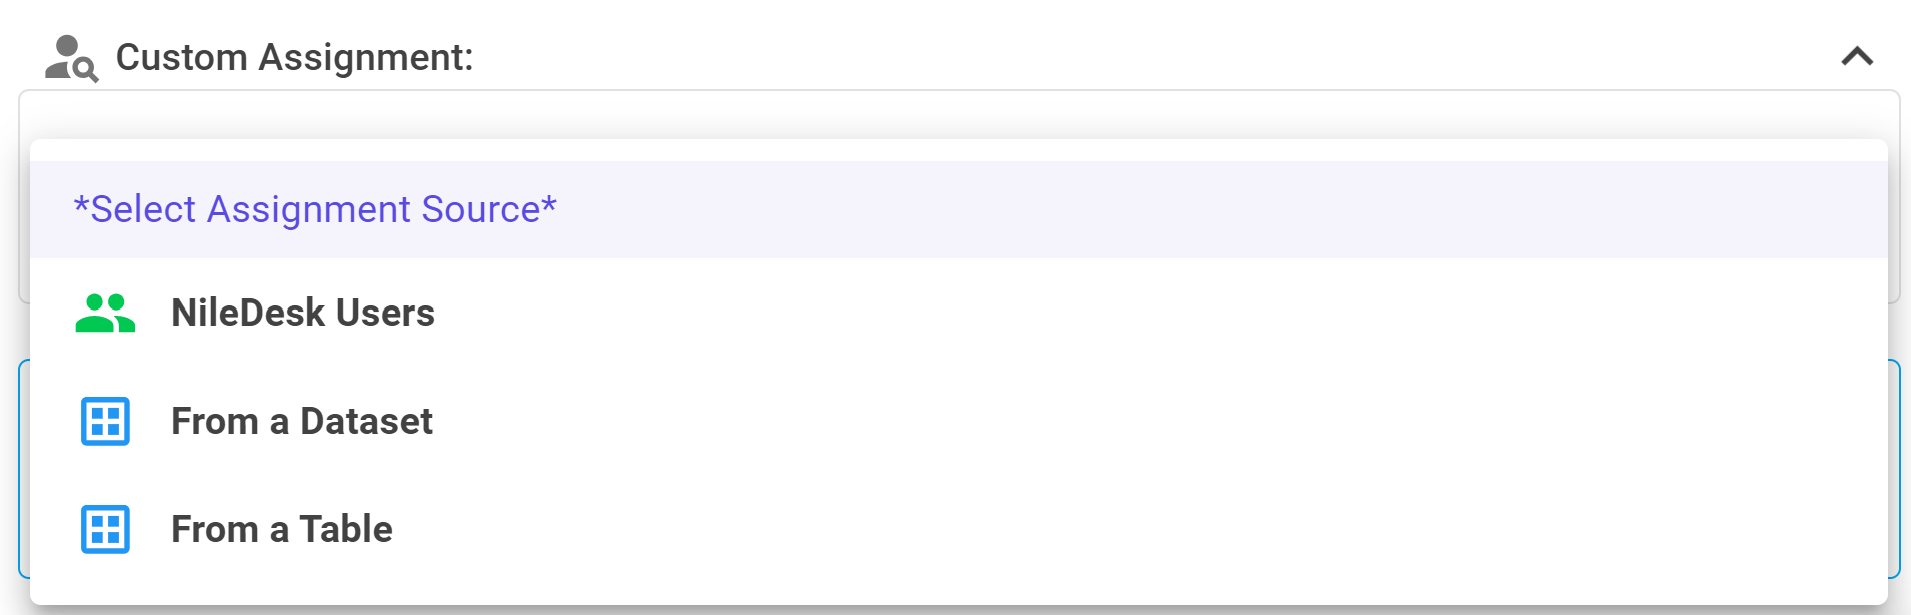
From Users:
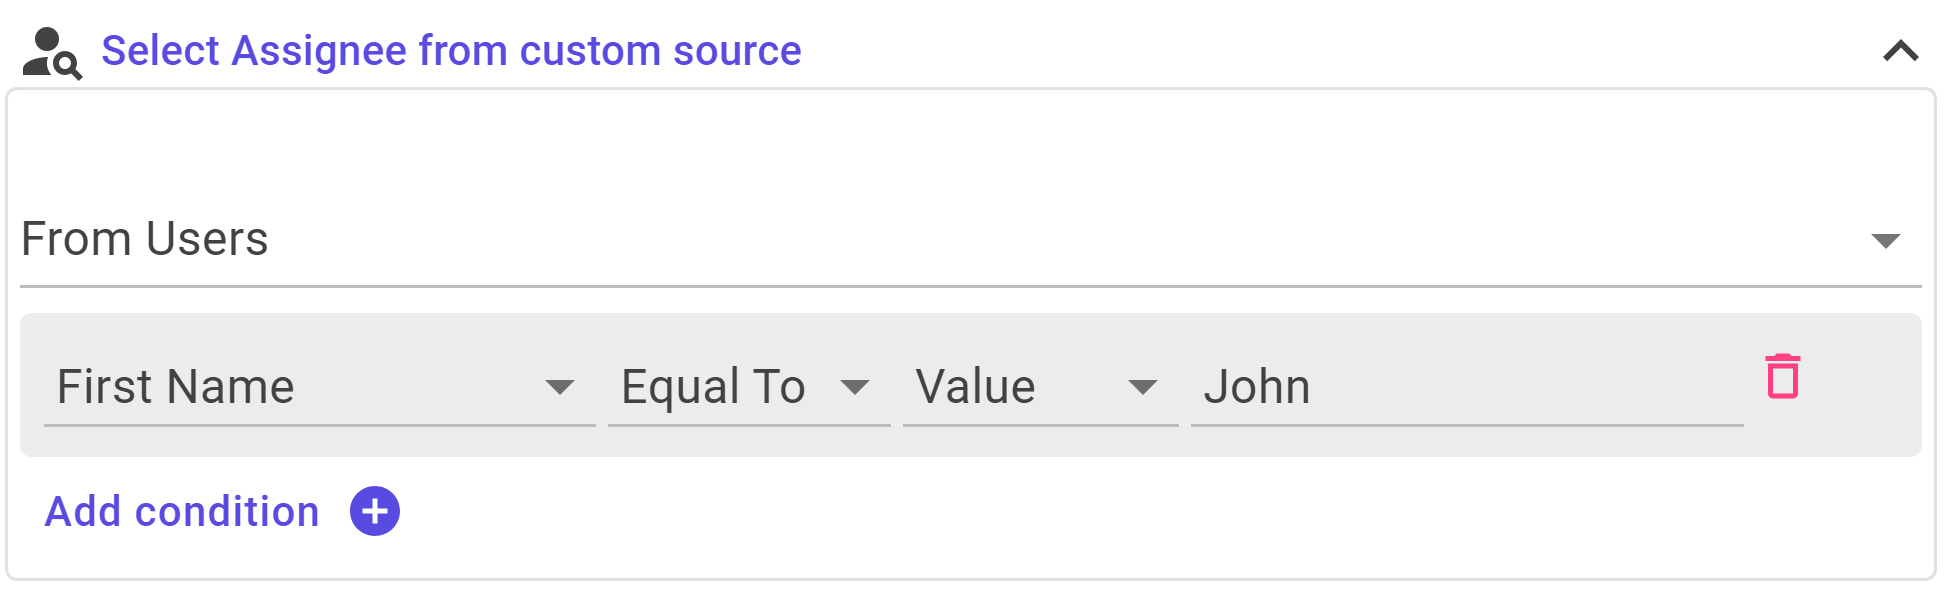
Clicking on the Add Condition button reveals a dropdown. This Dropdown is showing all the Fields of User.
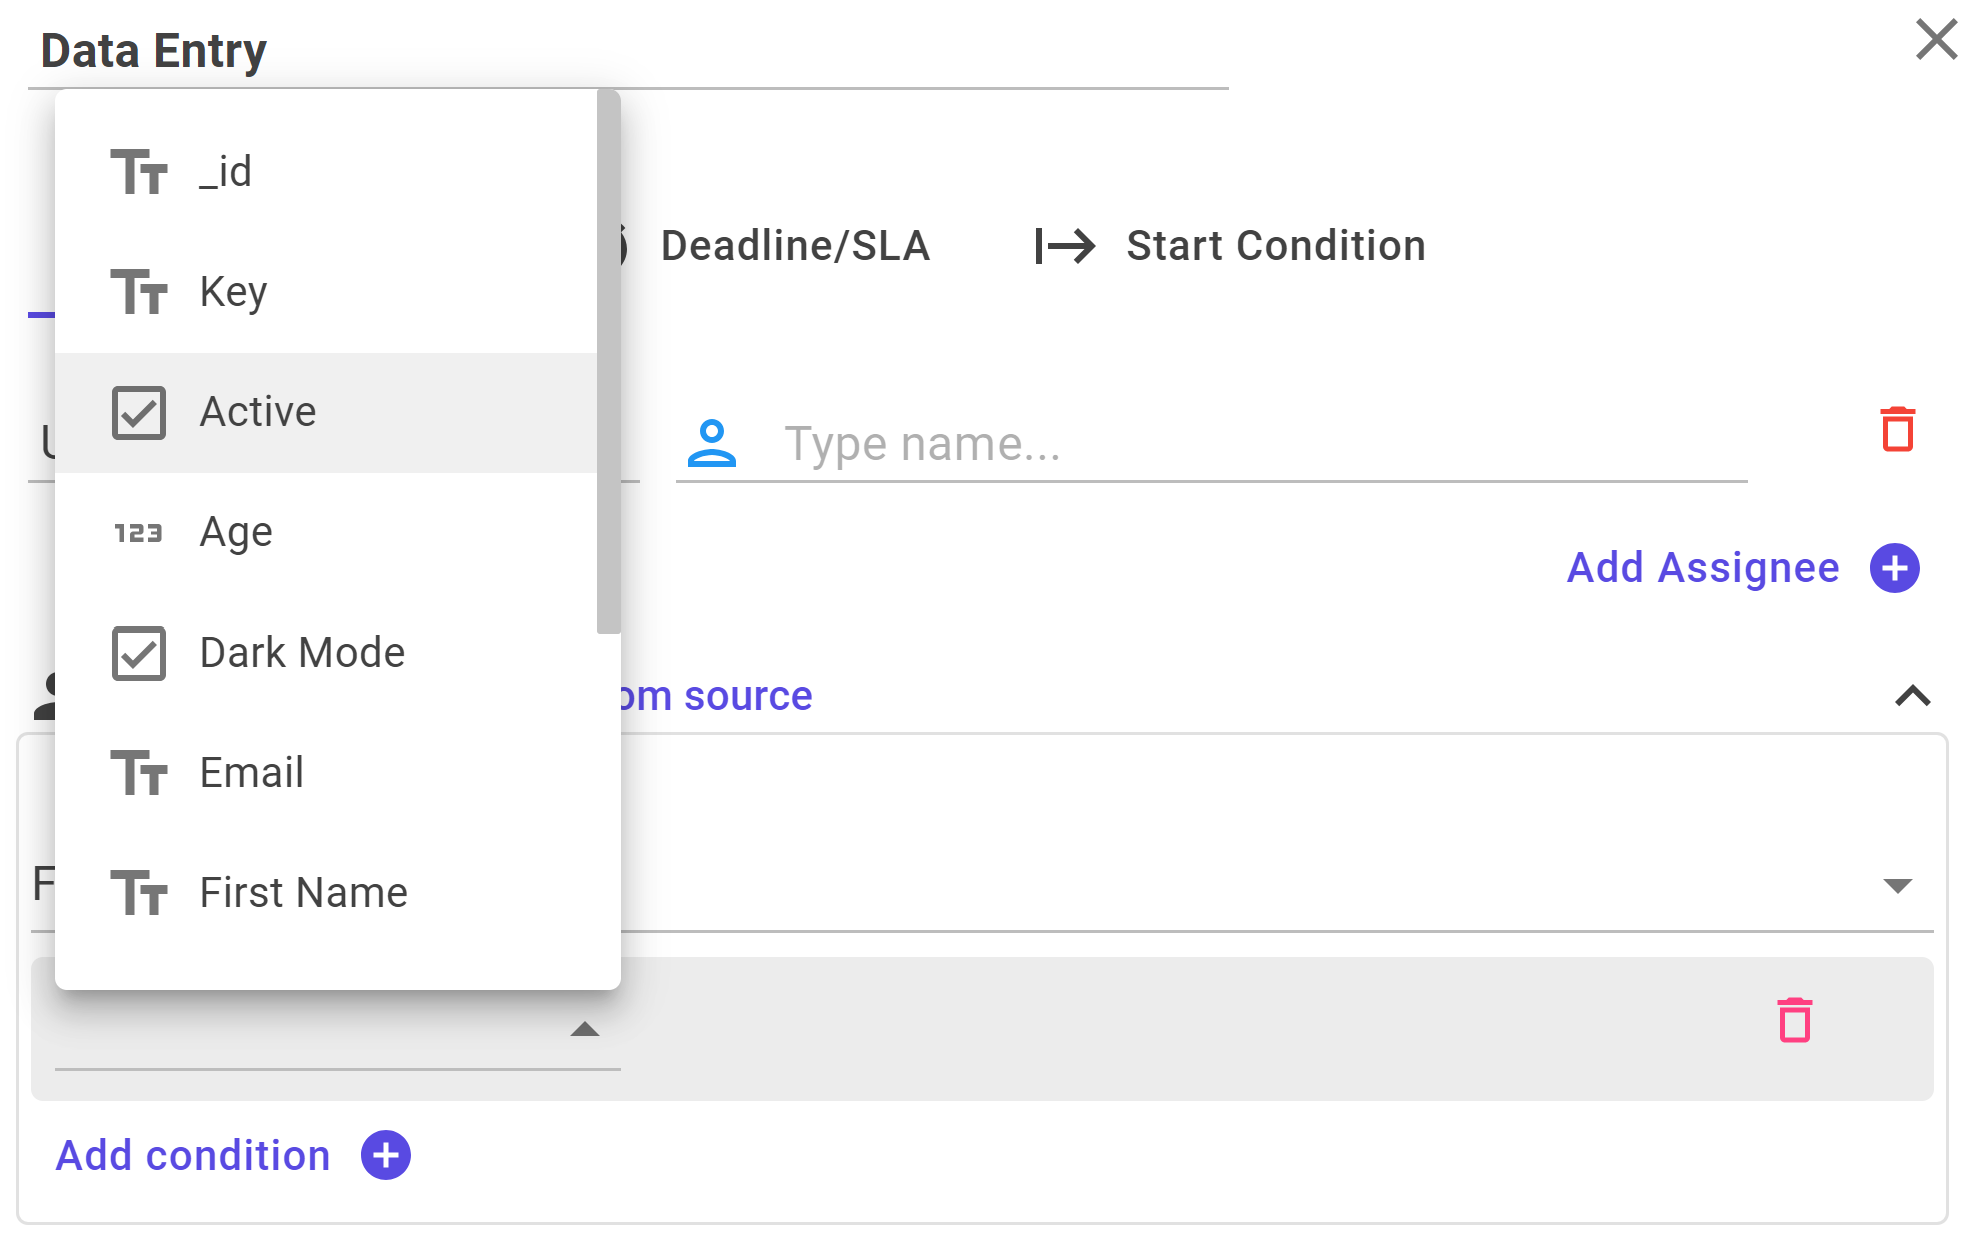
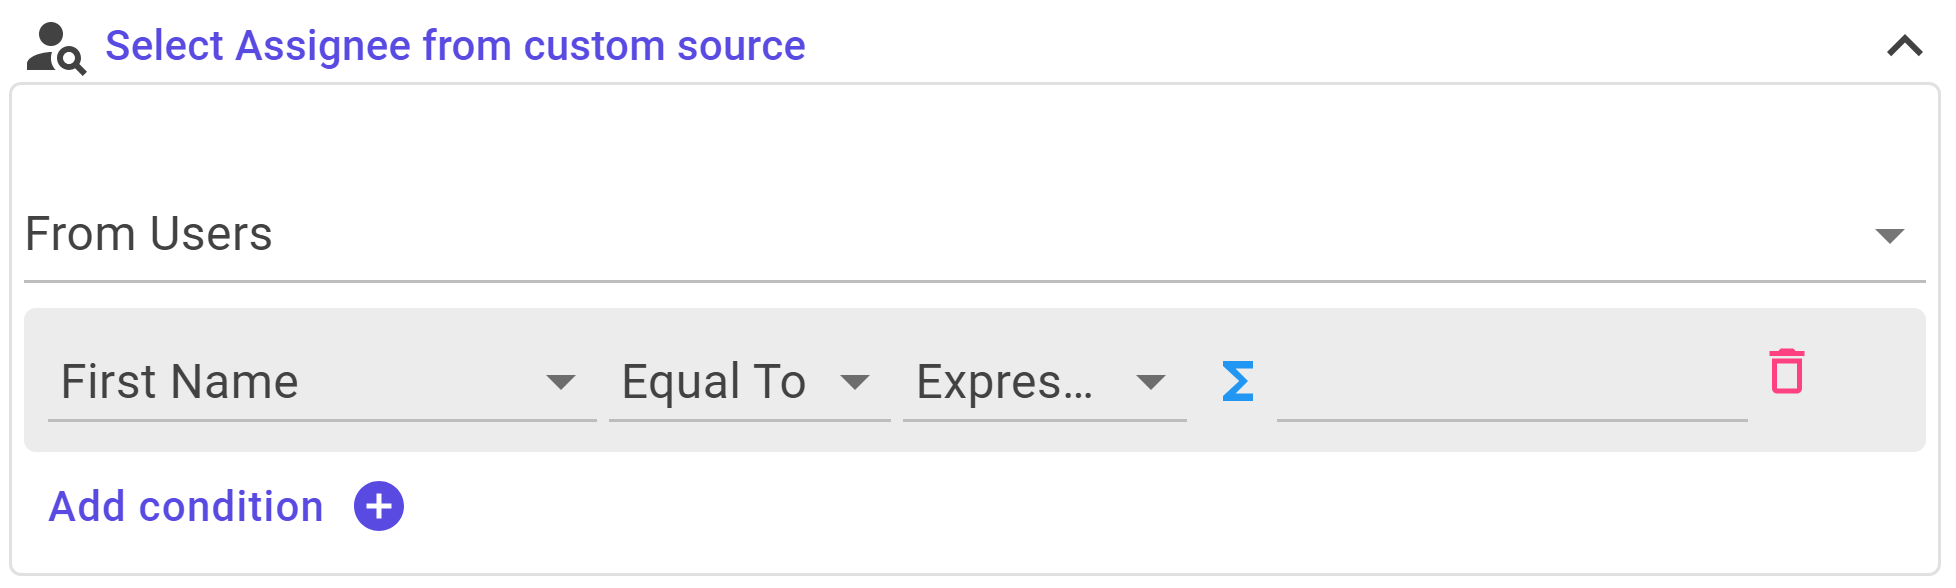
After selecting Field, you encounter two more drop-downs. The first one lets you choose the Condition, specifying how you want to filter the data. The second drop-down determines where the system should check this condition—whether by comparing Values directly, referencing another Field, or using a custom Expression.
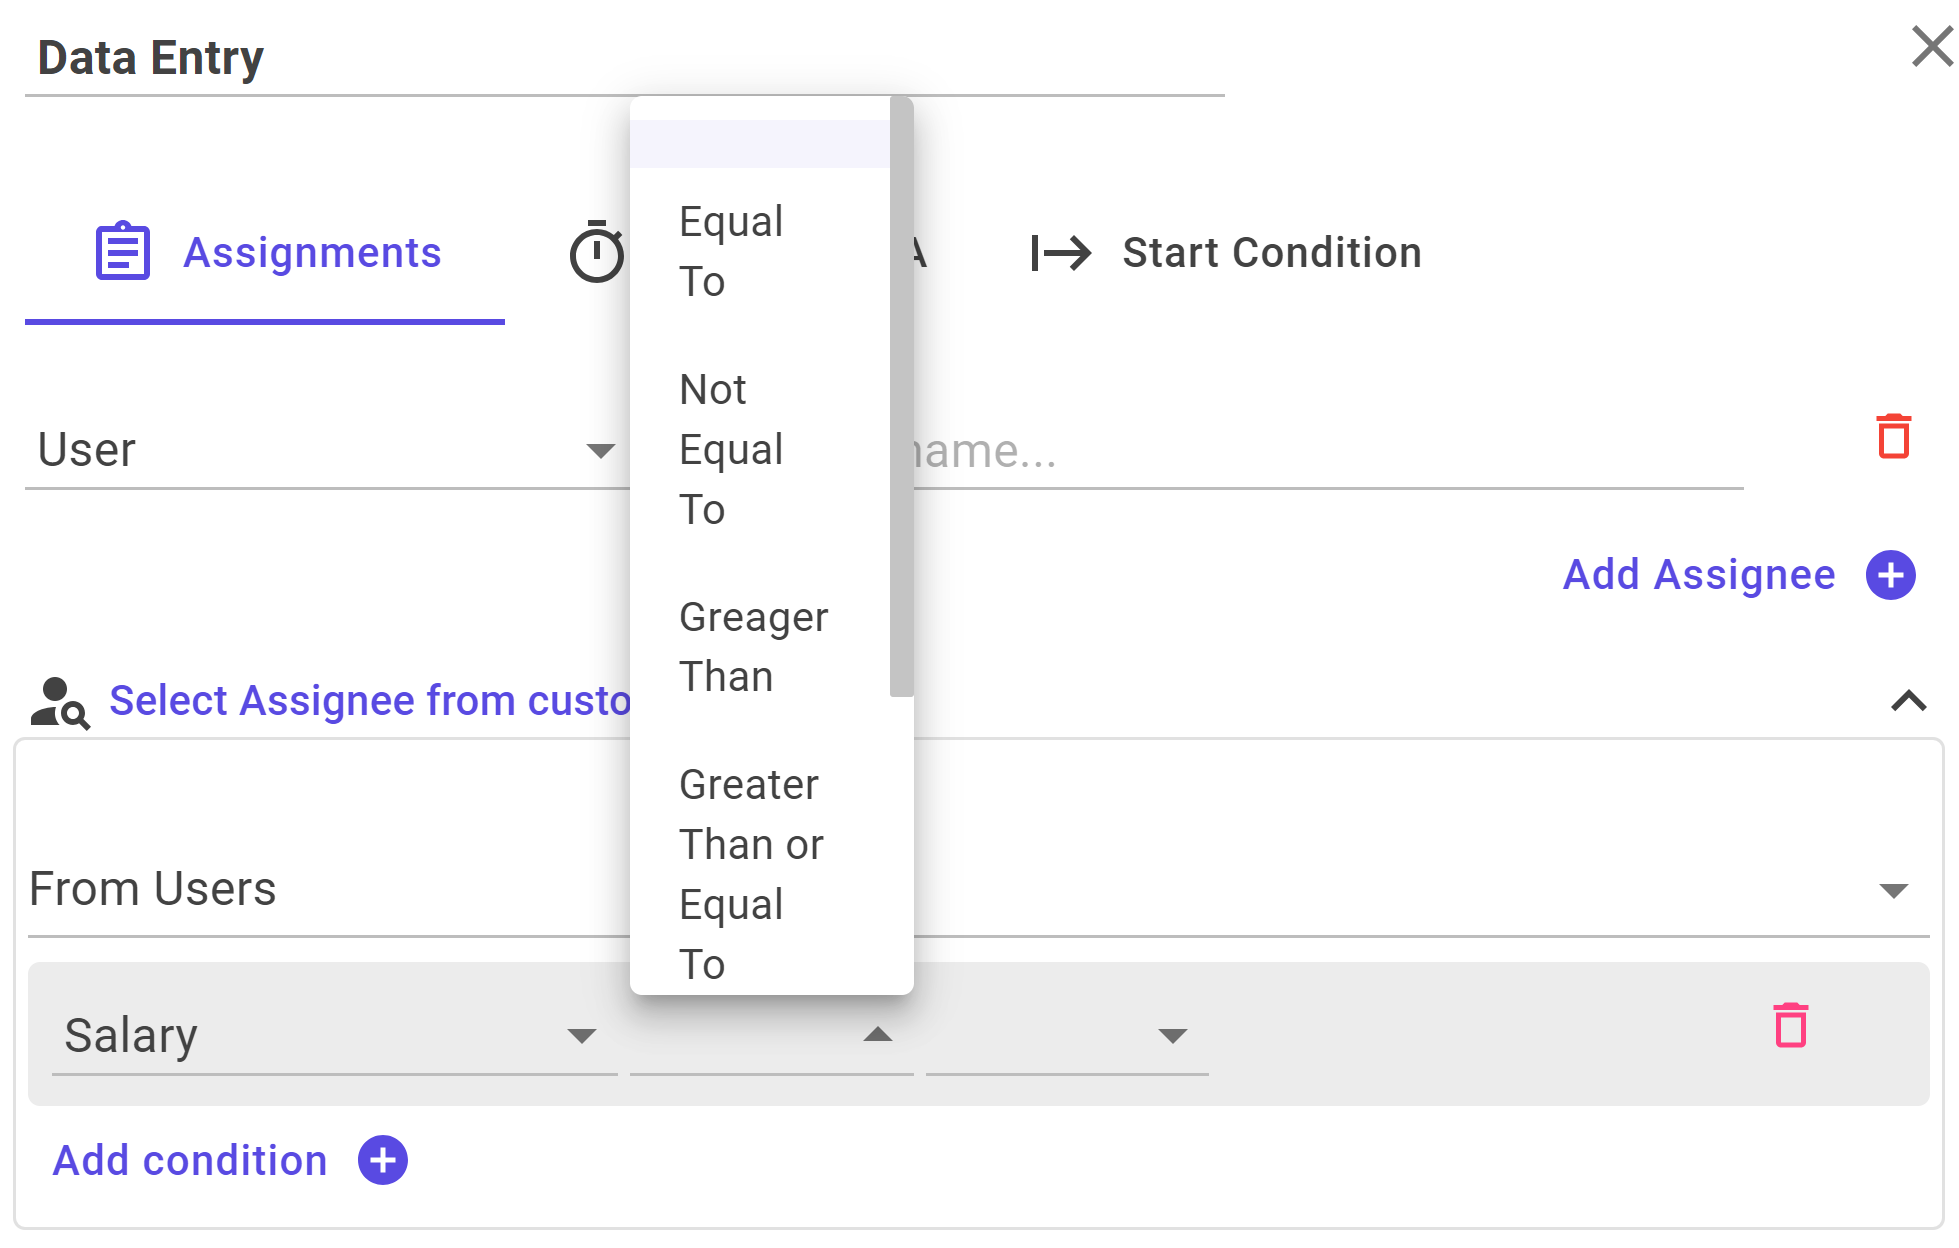
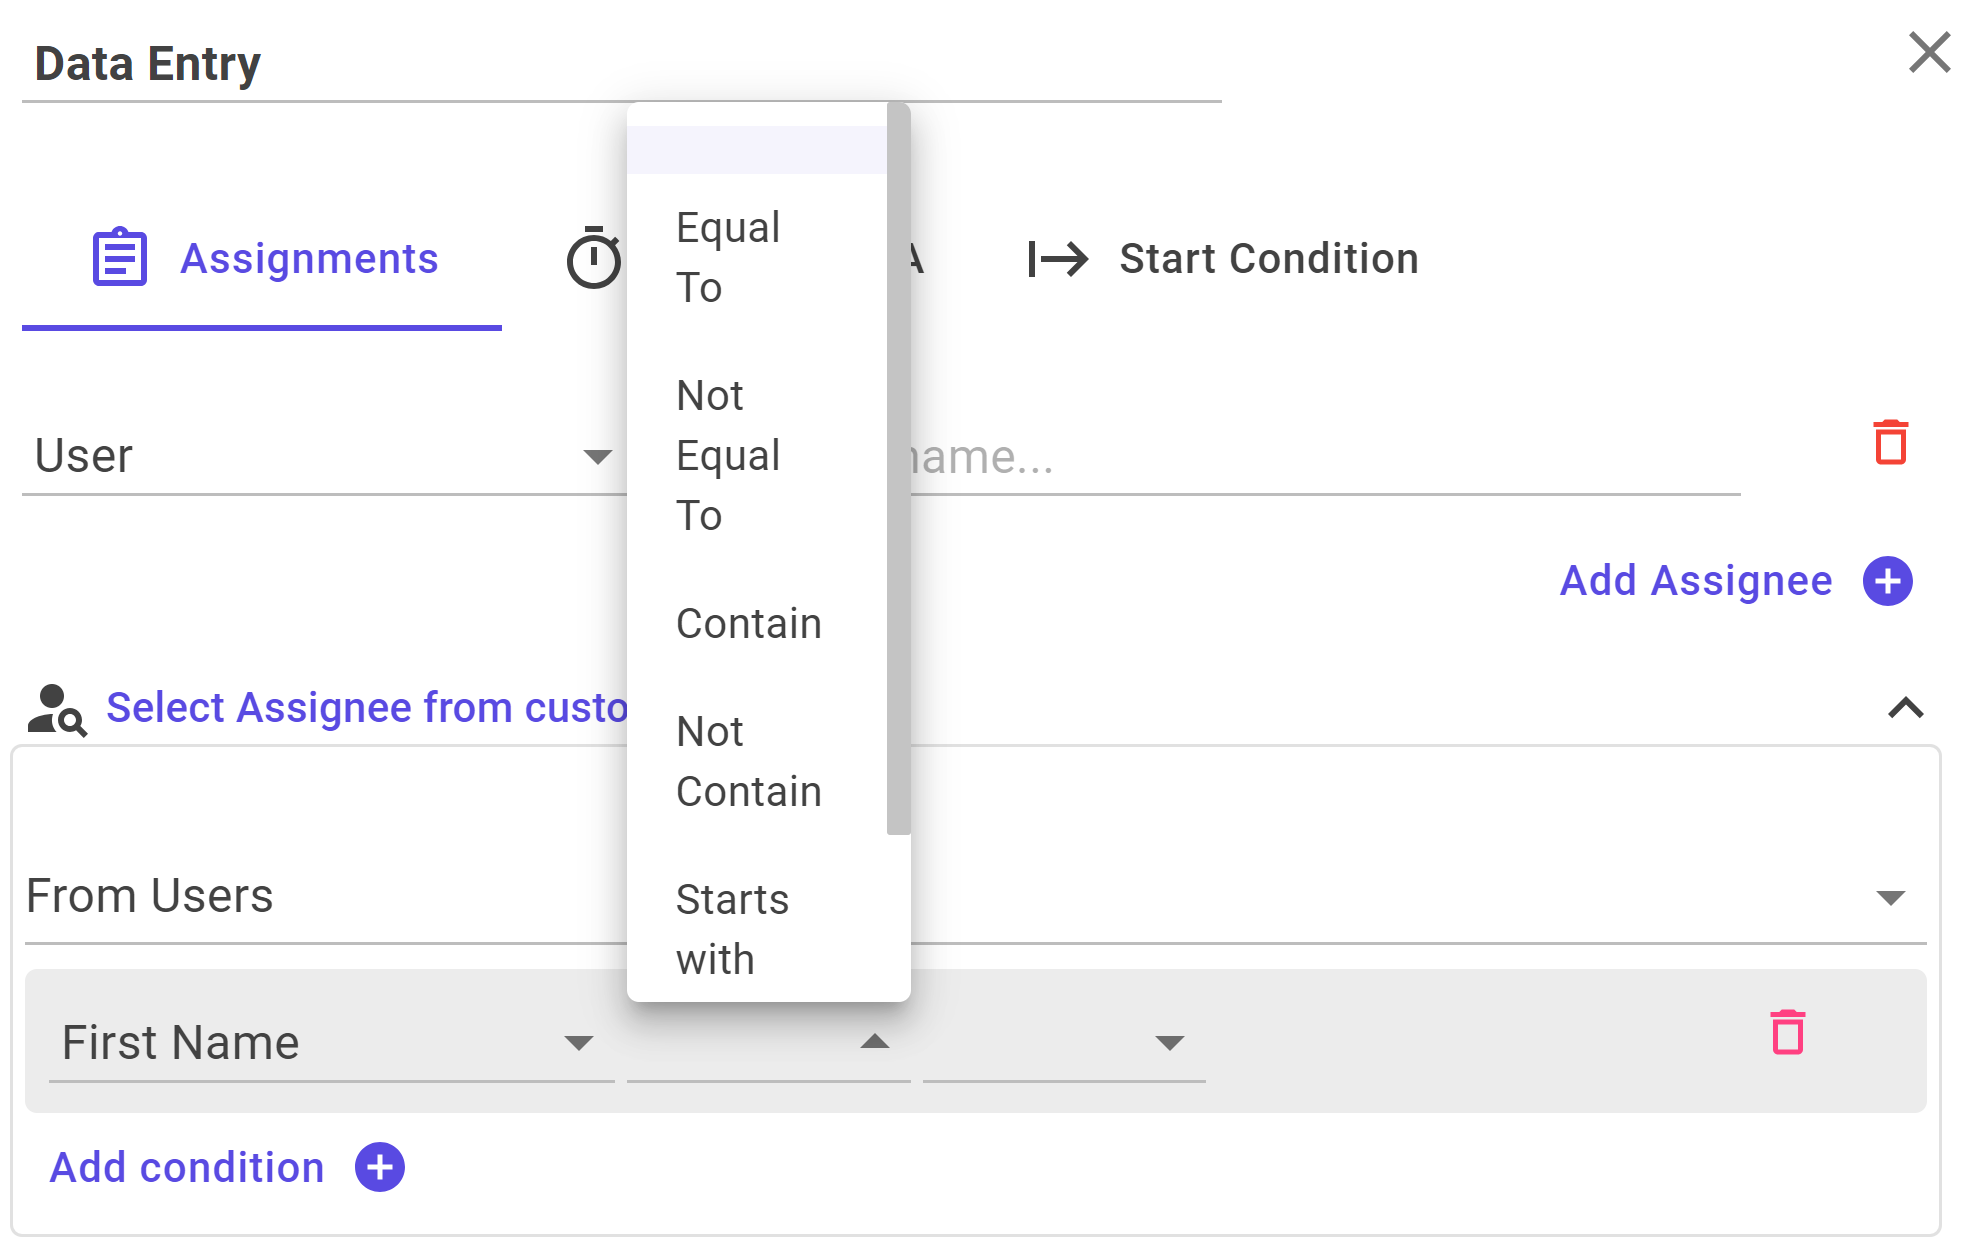
In the second drop-down for conditions, your choices are dynamically tailored to the type of the selected field.
For instance, if the field is of Integer Type, you might see conditions like:
- Equal To: Matches values that are exactly equal.
- Not Equal To: Filters out values that are not equal.
- Greater Than: Selects values greater than the specified number.
- Greater Than or Equal To: Includes values greater than or equal to the specified number.
- Less Than: Chooses values less than the specified number.
- Less Than or Equal To: Includes values less than or equal to the specified number.
If the field is of Text Type, you might see conditions like:
- Equal To: Matches values that are exactly equal.
- Not Equal To: Filters out values that are not equal.
- Contain: Includes values that contain a specific sequence of characters.
- Not Contain: Excludes values that contain a specific sequence of characters.
- Starts With: Filters values that start with a specific sequence of characters.
- Ends With: Filters values that end with a specific sequence of characters.
In the third drop-down, you decide where the system should check the selected condition:
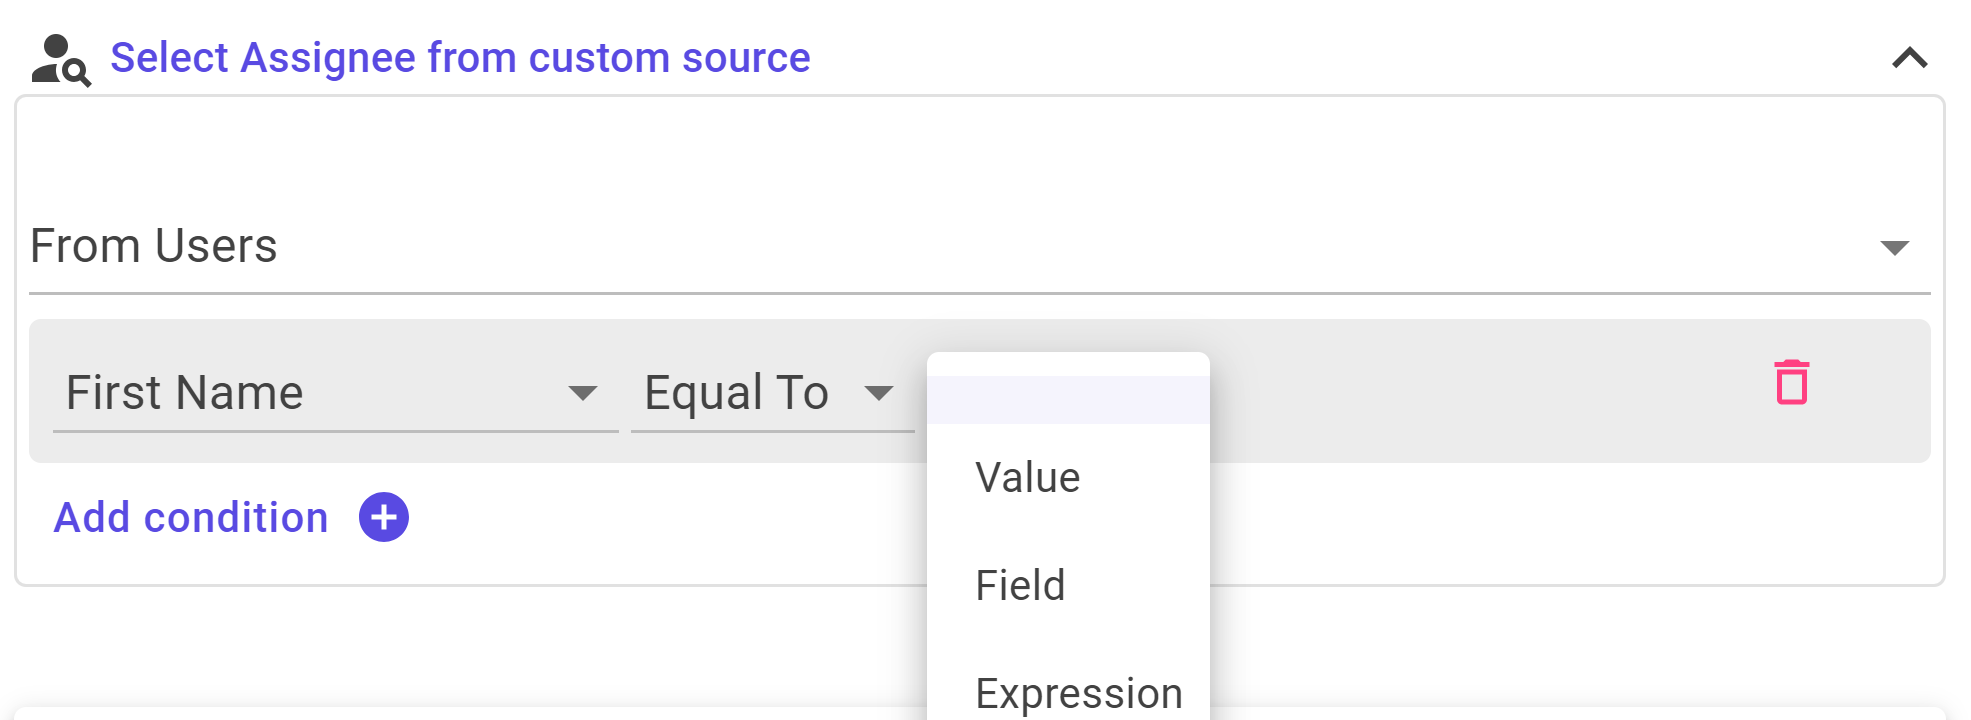
- Value: If you choose this option, an input field appears, allowing you to enter a specific value
against which the condition will be evaluated.
- Field: Select this option to compare the condition against another field within the dataset.
Selecting this option displays fields of the same type as the initially chosen field in the filter.
- Expression: If you want to define a custom expression for condition evaluation.
This allows for advanced and dynamic condition setups.
From Datasets:
If you choose to assign the document based on a dataset, you will encounter two dropdowns for configuration:
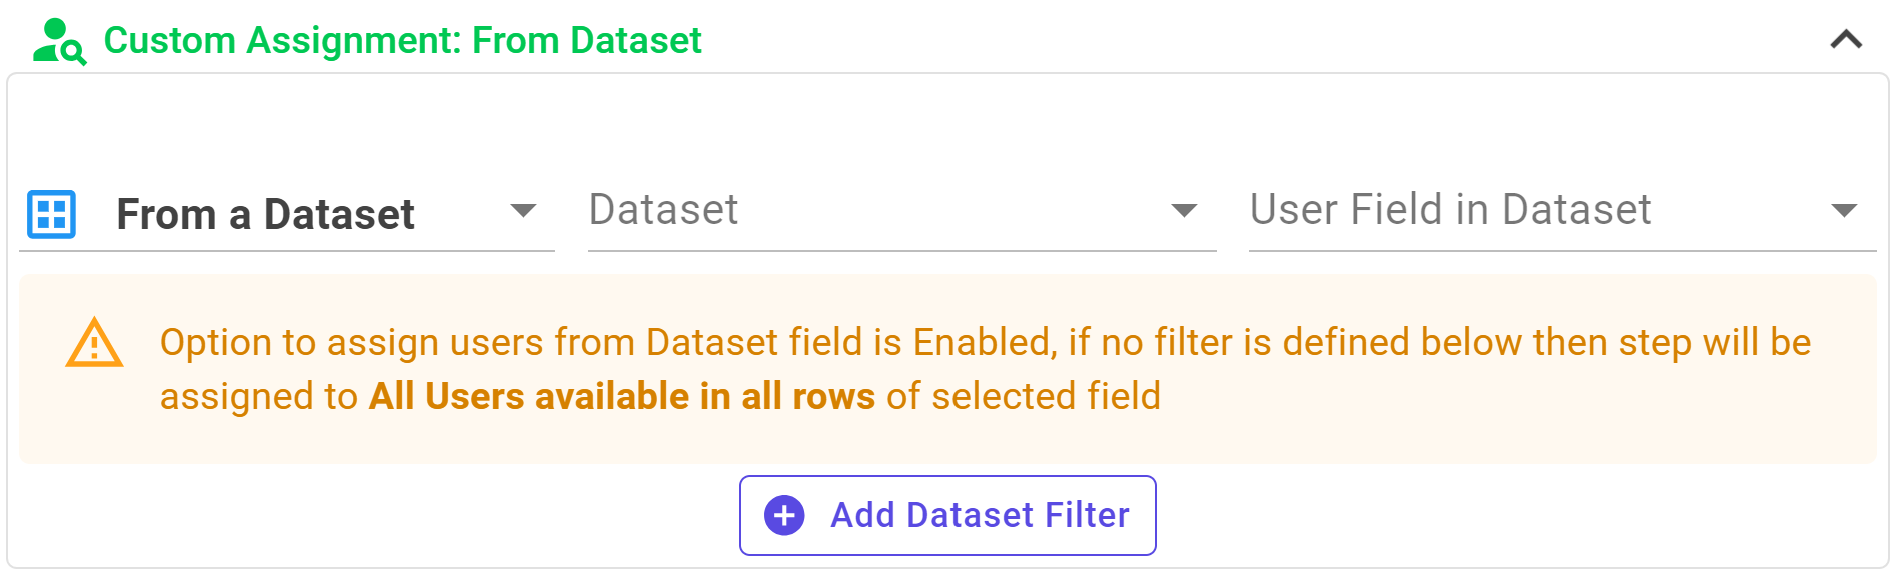
- Dataset: Choose the dataset from which you want to select assignees. This dropdown displays all available Datasets.
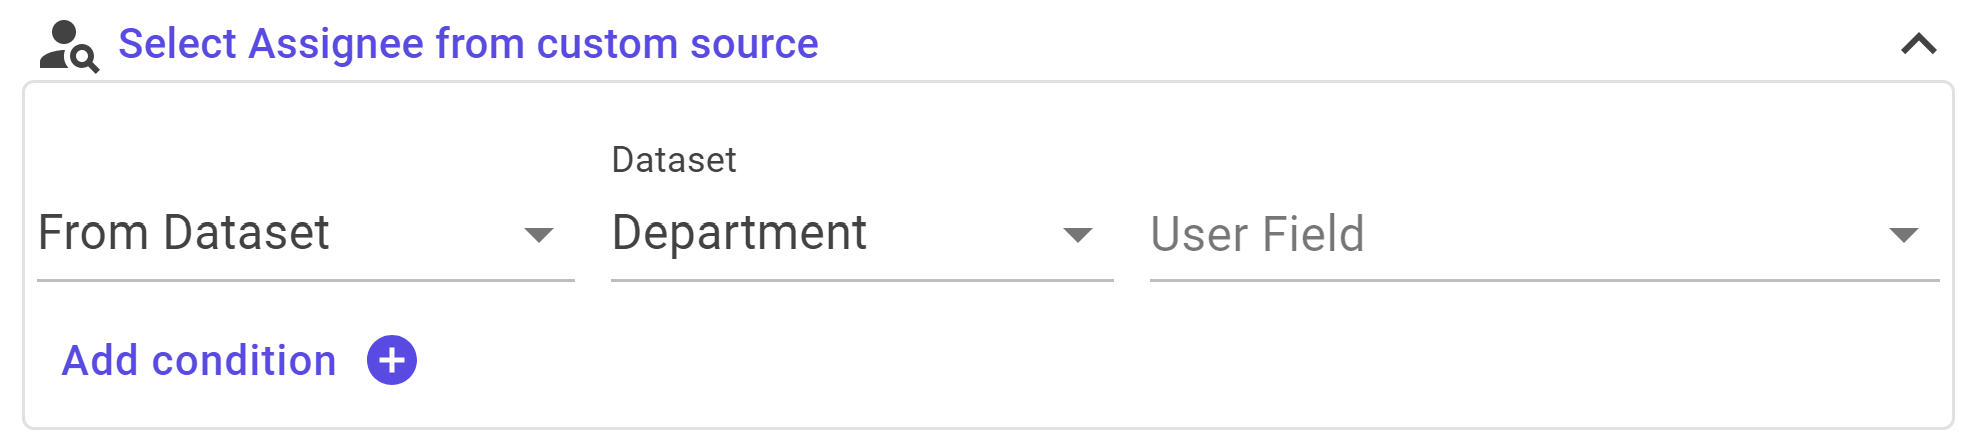
- User Field: After choosing the dataset, Here it will the User Field of the selected Dataset.
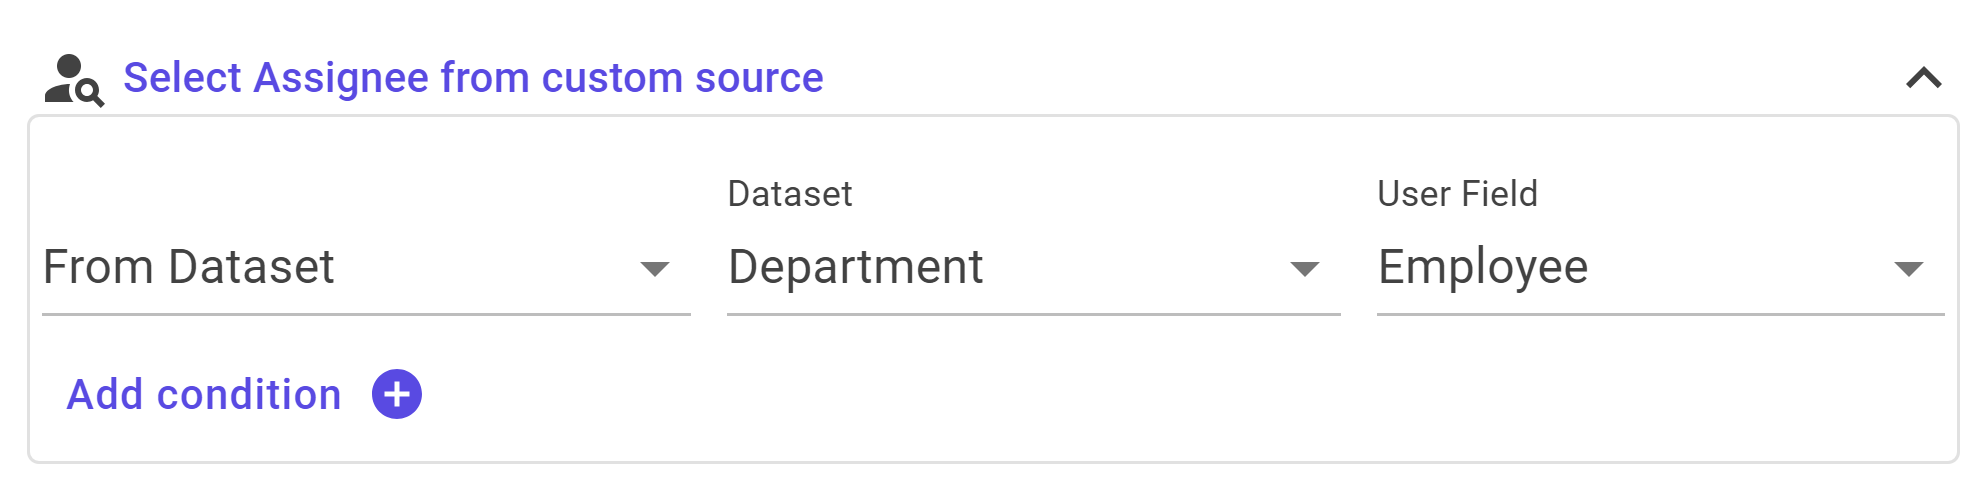
Note: For conditions see From User section
In the Multi-Assignment section de, you can specify how the document is assigned when there are multiple assignees. Choose an option from the dropdown:
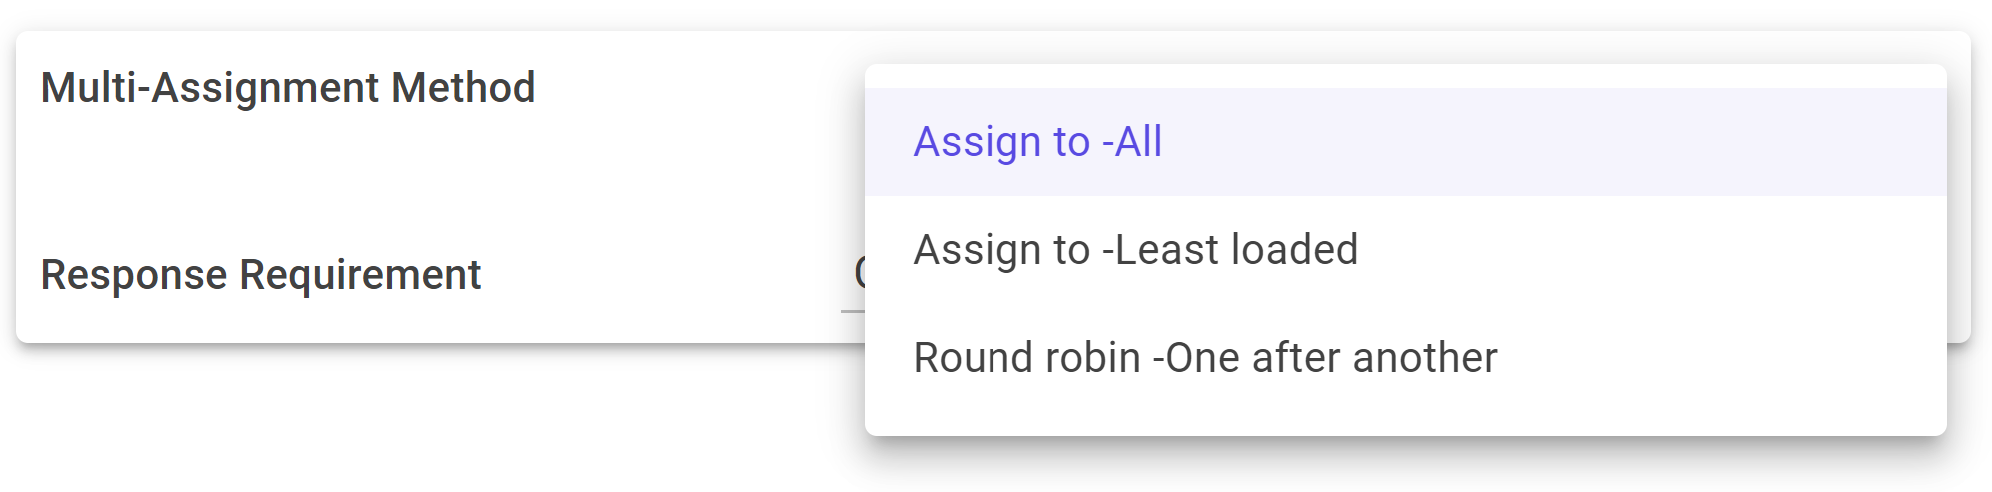
- All Assignees: Assign the document to all selected assignees.
- Least Loaded: Assign the document to the least loaded assignee, distributing tasks evenly.
- Round Robin: Assign the document to assignees one after another in a cyclical manner.
In the Respnse Requirement dropdown, you can specify how many assignees need to respond to the document. Choose an option that suits your needs:
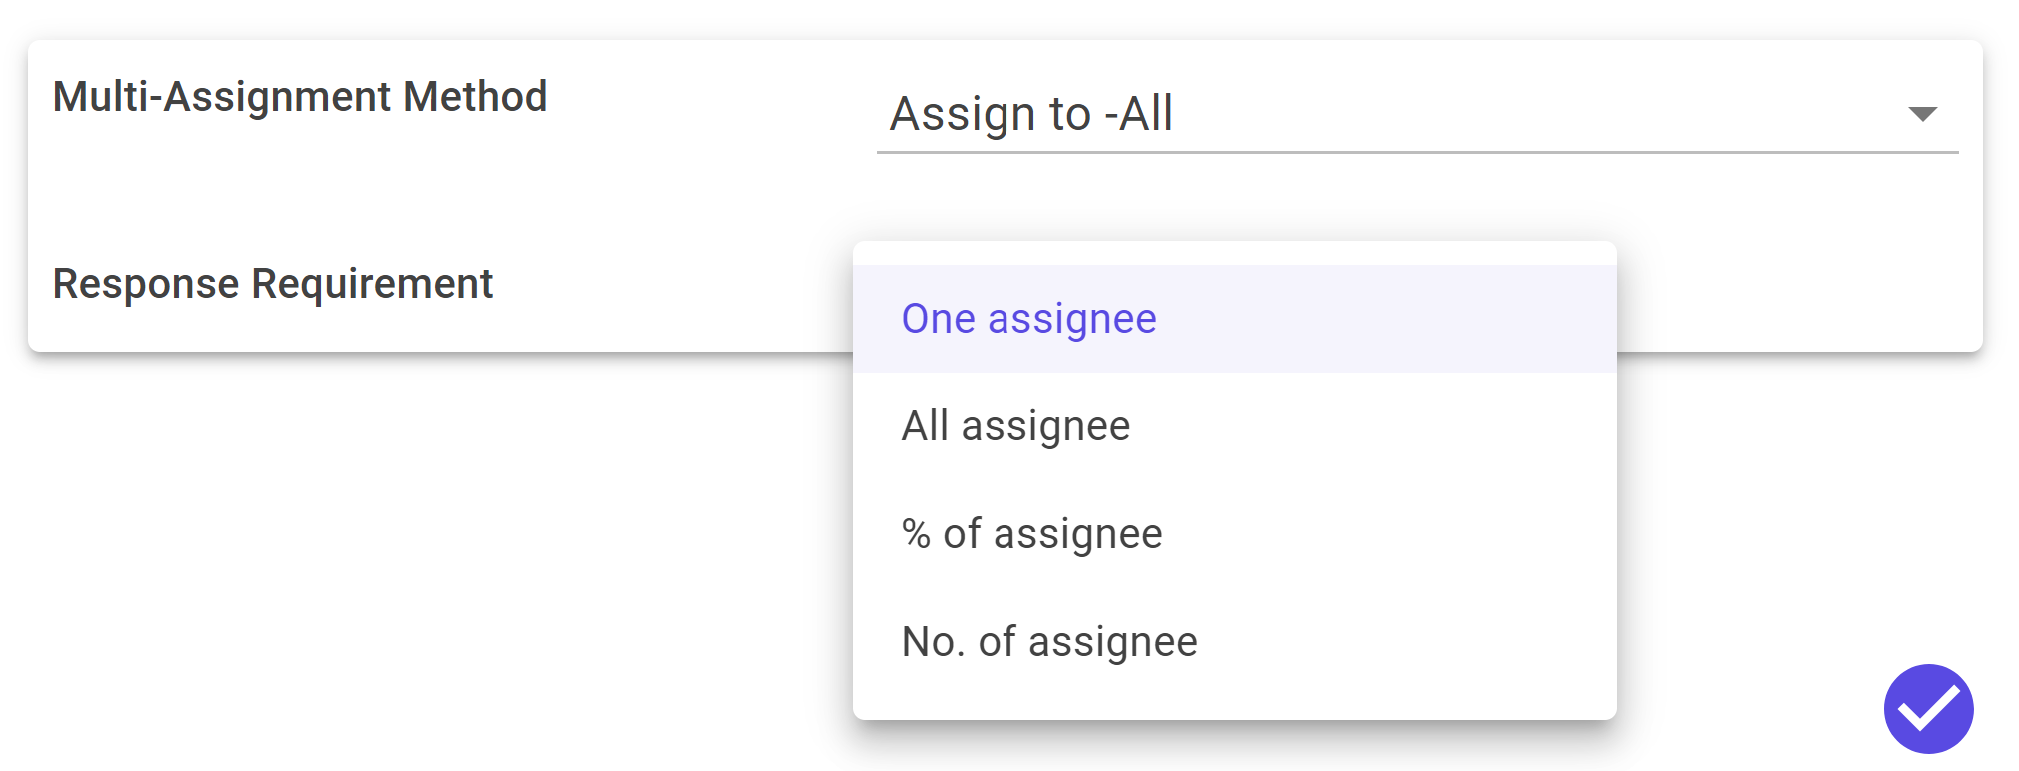
- One Assignee: Require a response from just one of the assigned individuals.
- All Assignees: Mandate responses from all selected assignees.
- % of Assignees: Set a percentage, and responses from that portion of assignees will be required.
- No. of Assignees: Specify the exact number of assignees from whom responses are needed.
Deadline/SLA
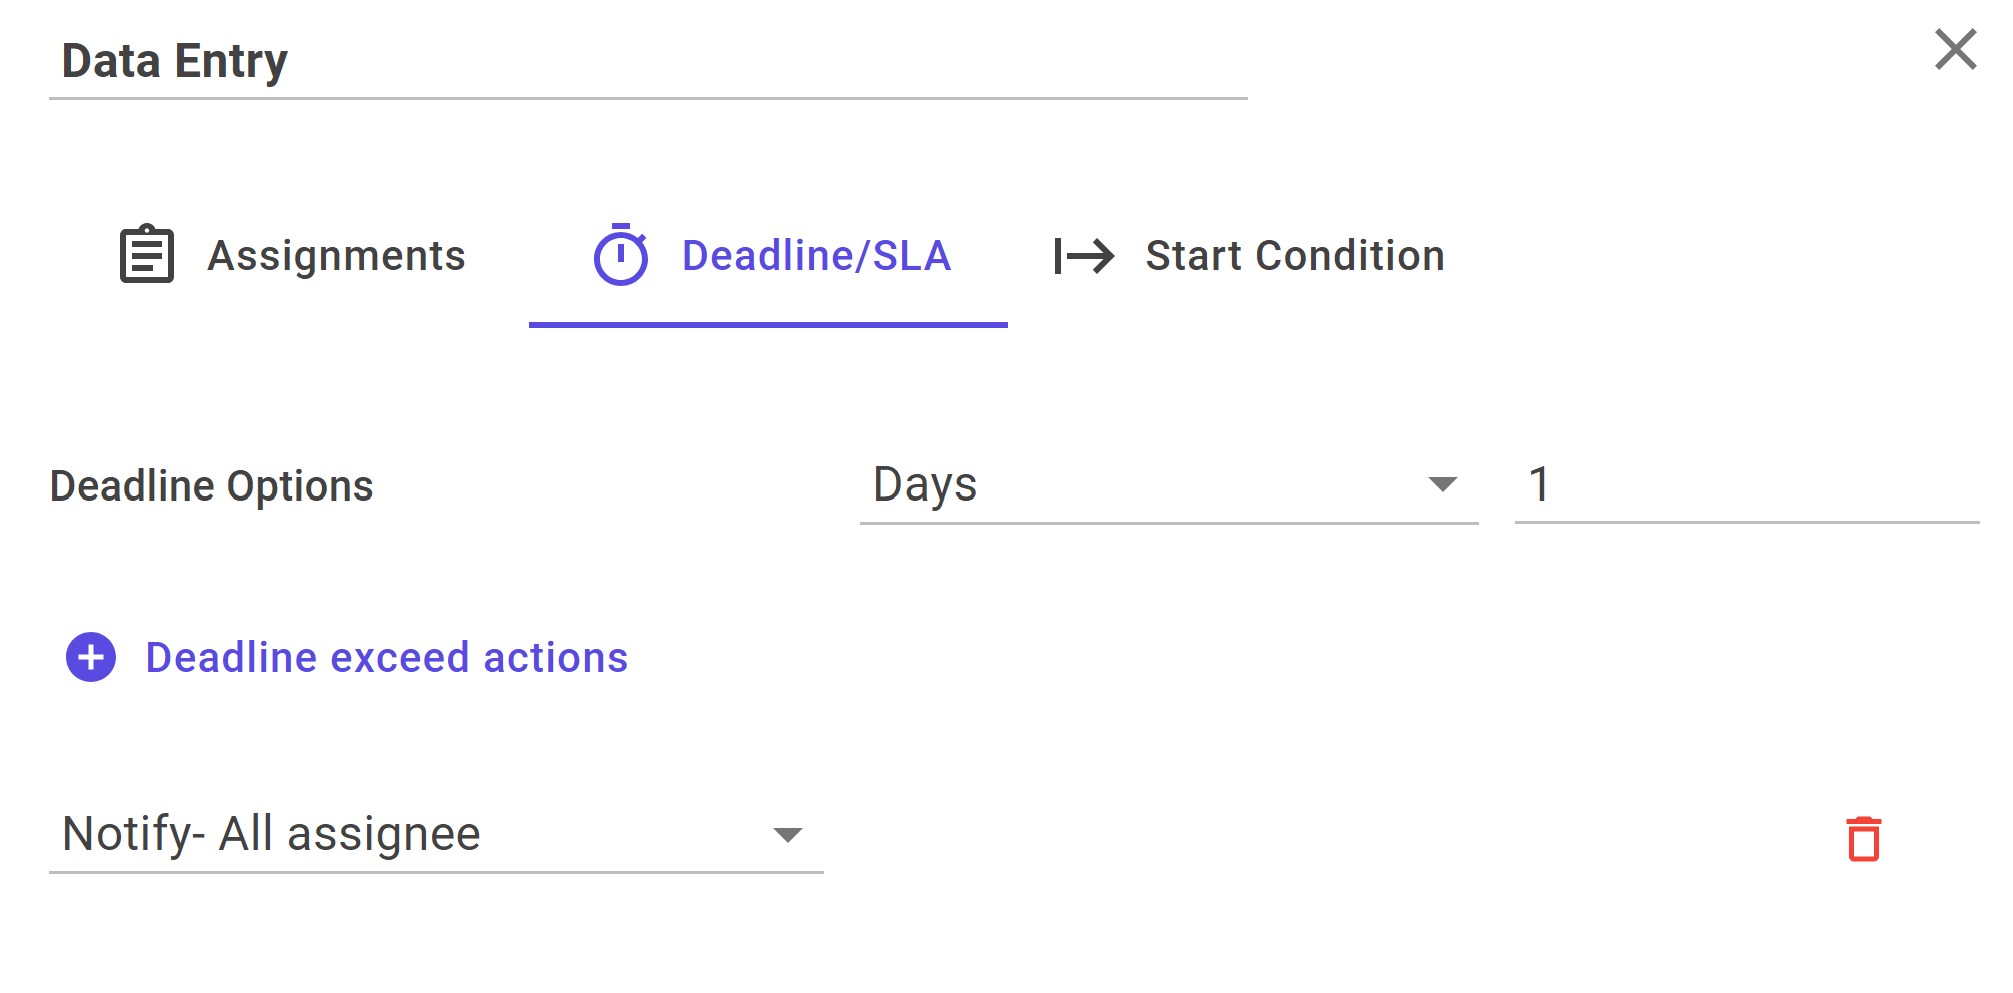
The Deadline refers to the specified timeframe within which a document must be completed or a response is required. It is a crucial aspect of task management, ensuring timely execution and contributing to the overall success of the project.
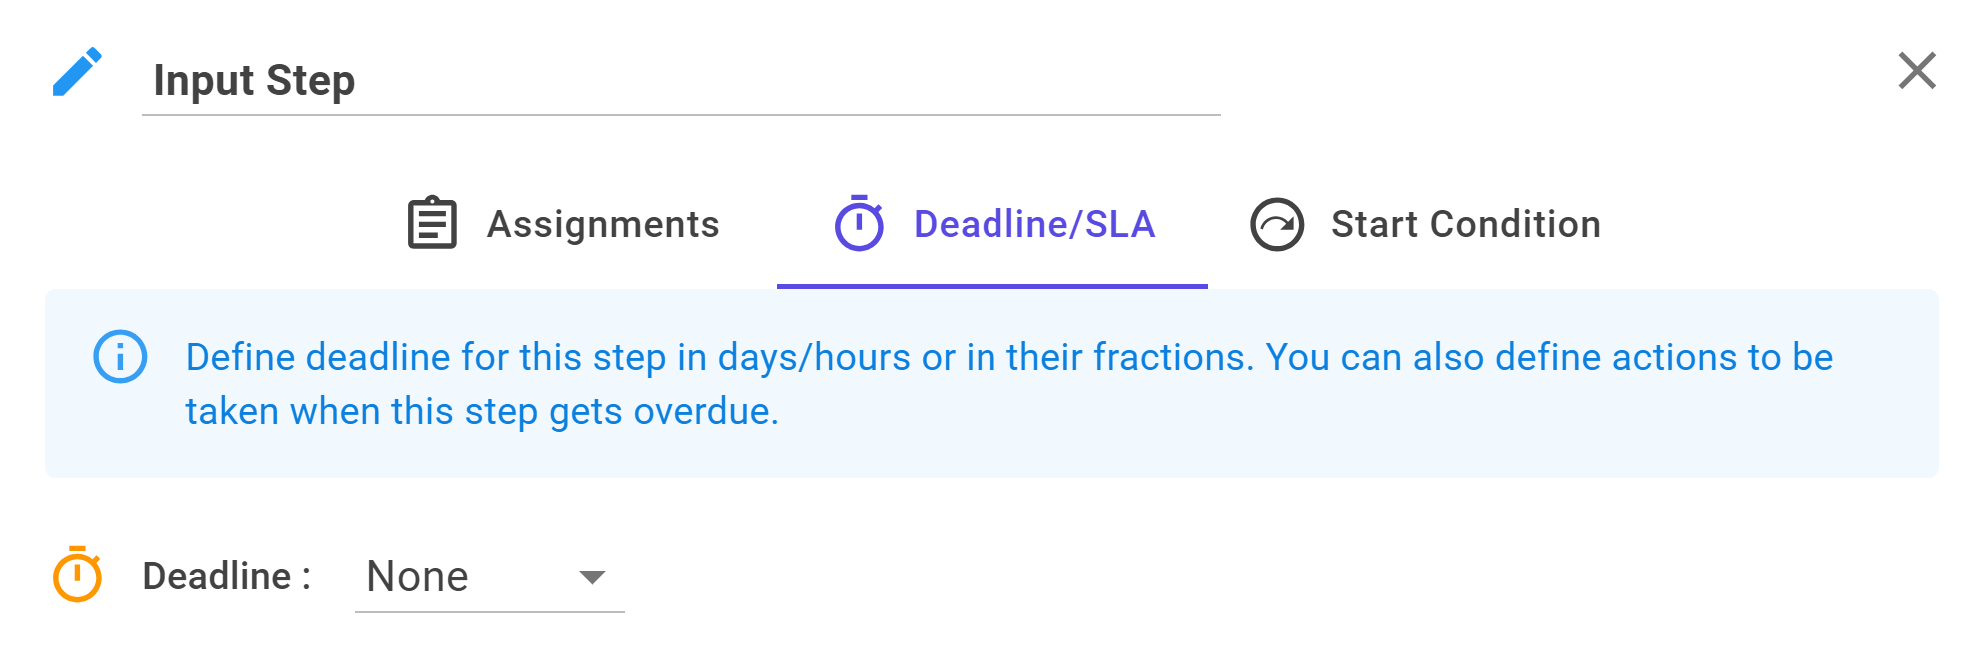
When setting a deadline for the document, you can choose from options like Days, Hours or None
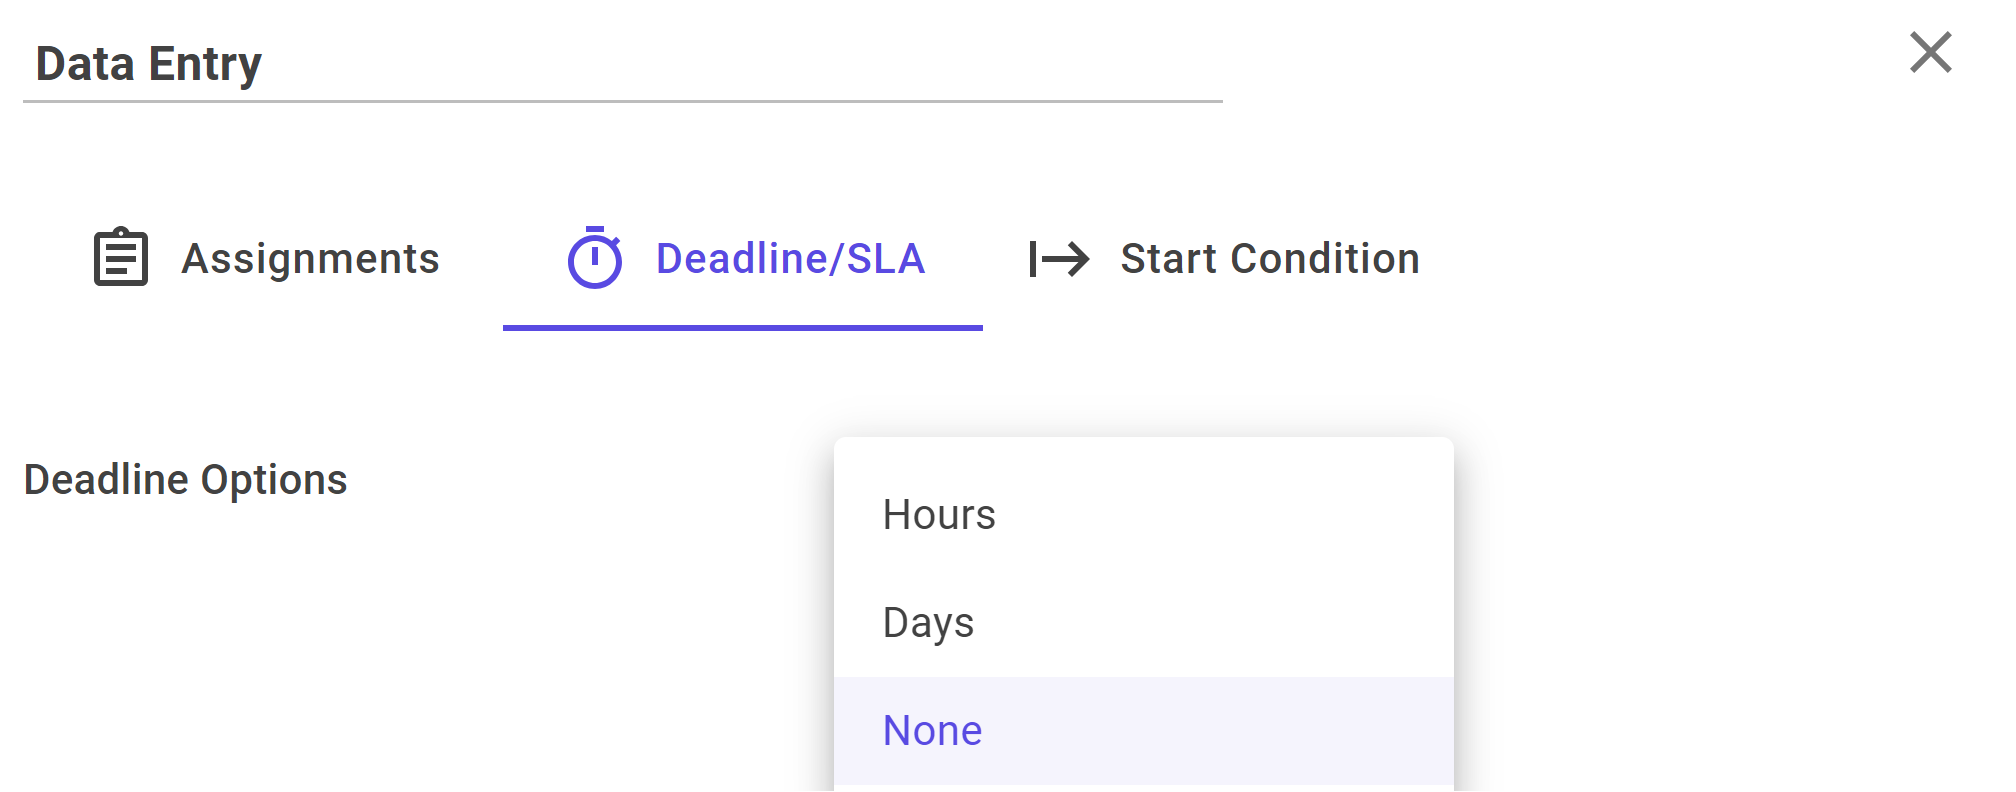
- Hours: Set a deadline in terms of hours.
- Days: Set a deadline in terms of days.
- None: Allow flexibility in completion by choosing no specific deadline.
Setting a deadline will also provide an option to define what actions to take if the deadline is exceeded, ensuring a proactive response to delays. By default it set to Notify All Assignee
If the deadline is exceeded, you can choose from the following options:
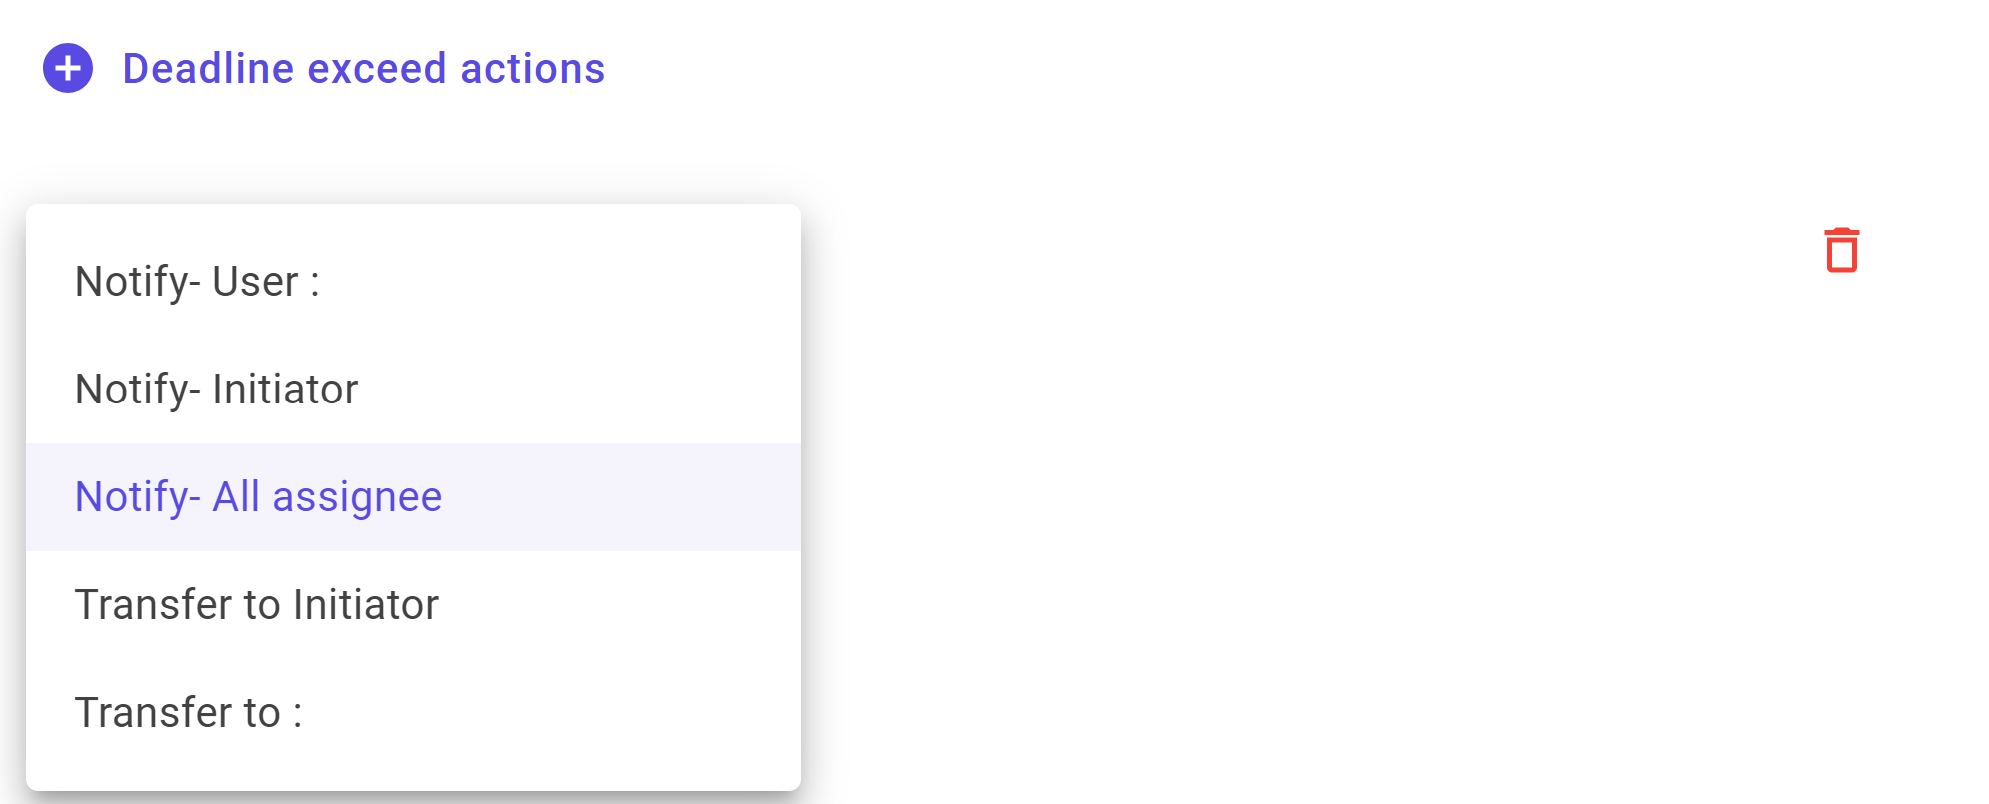
- Notify User: Send a notification to the assigned user about the exceeded deadline.
- Notify Initiator: Inform the document initiator about the deadline exceedance.
- Notify All Assignees: Send notifications to all assignees of the document regarding the exceeded deadline.
- Transfer to Initiator: Transfer ownership of the document to the initiator in case of a deadline exceedance.
- Transfer to User: Transfer ownership to a specific user if the deadline is exceeded.
Additionally, you can add more Exceed Action using the plus icon button and delete options using the delete icon button.